Some people think Noah had einkorn on the ark, because it was the first cultivated wheat over 7,500 years ago. None of us were actually there to witness the event, he may have brought a few kinds. Einkorn is believed to have originated in southeast Turkey. Mount Ararat, where the ark resides, is in eastern Turkey. Regardless of what grains Noah had, einkorn is one of the four ancient grains of Israel.
What does it taste like? Most people say nutty and toasted wheat. I think it tastes like a cross between what we know as wheat and popcorn. Yes, popcorn! I’ve cooked whole wheat einkorn in the past, and I really taste wheat-popcorn. It’s even kind of sweet.
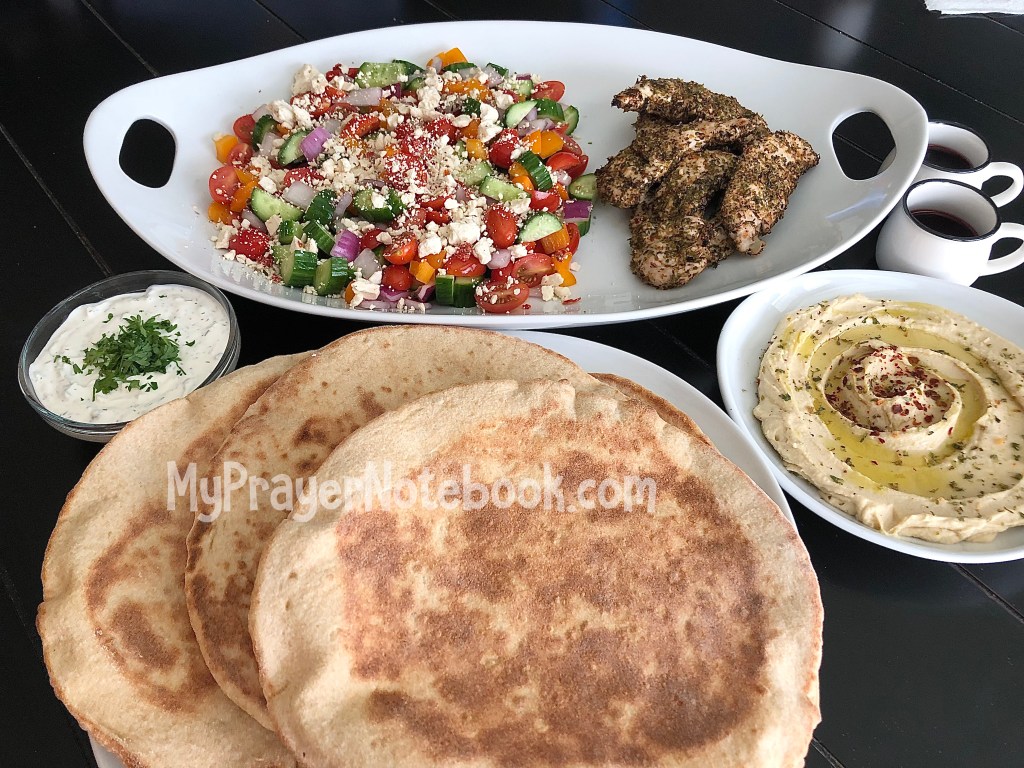
Greek salad with herbed chicken, Meyer lemon hummus, and tzatziki. It could have really used some Kalamata olives, but those are a little difficult to come by in the deep south.
Einkorn is expensive, so I limited my recipe to just 1 cup so you can make a variety of things with your flour. Einkorn doesn’t rise as well as white flour, so I highly recommend using Fleischmann’s new yeast with dough improver, which you should be able to find at your grocery store.
Please do not use my recipes for your own personal gain, thank you. They are meant to encourage communion and fellowship with family and friends.
Einkorn Pitas
Ingredients:
1 (120 grams) cup bread flour
1 cup einkorn flour
1-1/8 teaspoons (4.5 grams) Fleischmann’s® RapidRise® Plus Instant Yeast with Dough Enhancer
1/2 teaspoon (3 grams) kosher salt
1 teaspoon (4 grams) sugar
1 tablespoon (14 grams) olive oil
3/4 cups (171 grams) water
Dough:
Making by hand
In a heavy medium sized bowl, stir together the flours and make a well in the center. Add the salt to the upper wall of the well. Salt kills/impedes yeast, I don’t like to make direct contact immediately. In the well, add sugar, olive oil, and water. Mix with a wooden spoon and then change to your hands or use gloves and mix the dough together. Once it’s a cohesive mass, knead the dough for about 1 minute. You want the dough to be a little wet and sticky. Instead of kneading for 8-10 minutes to properly develop the gluten, I recommend doing at least 4 stretch and folds. Do not by-pass this step or you will have a very dense undesirable bread.
Stretch and fold
If you made the dough by hand, leave the dough to rest covered in the fridge for 30 minutes. Take the dough out for stretch and fold. If you have gloves, this is easy, if not your hands may need a little water for the first couple stretches. The dough will become more smooth with each stretch and fold. Pick up the right side of the dough, and pull up until you feel resistance, and then fold it into the center. Pick up the left side of the dough and pull up until you feel resistance from the dough, and gently push it into the center. Pick up the bottom and top using the same method. Rest the dough in the fridge and repeat 3 more times, with a total of 4 stretch and fold events.
If you want your bread to have a little sourdough flavor, leave the dough on the counter to rest. If you do not, rest your dough in the fridge.
Standing Mixer
In the bowl of your standing mixer, stir together the flours and make a well into the center. Add the salt to the upper wall of the well. Salt kills/impedes yeast, I don’t like to make direct contact immediately. In the well, add sugar, olive oil, and water. Either use the paddle attachment until the dough is mixed, then switch to the dough hook (extra cleaning); or you can mix with a spoon and change to the dough hook when your dough starts to come together. Once your dough comes together, mix on medium low for 8 mins to develop gluten.
Proofing:
Place your dough in a lightly oiled bowl covered in the fridge over-night to rise. I highly recommend slow rises, because it makes for easier digestion. Not to mention, slow rises make for easier eating. When you eat American pizza, ever notice you’re playing a game of tug-of-war? If you can’t wait, you can rest the dough for 1-1/2 hours.
Shaping and baking:
Take the dough out of the fridge and turn it out onto a work surface, such as a large cutting board. Cut the dough into 4 equal pieces. Roll each piece into a tight ball, dust it lightly with flour and place it back into the bowl to allow the gluten to relax. Prepare your oven by placing a pizza stone in the middle of the oven, or an inverted baking sheet. Heat your oven to 500°. If you’re using a pizza stone, give your stone another 30 mins to heat up.
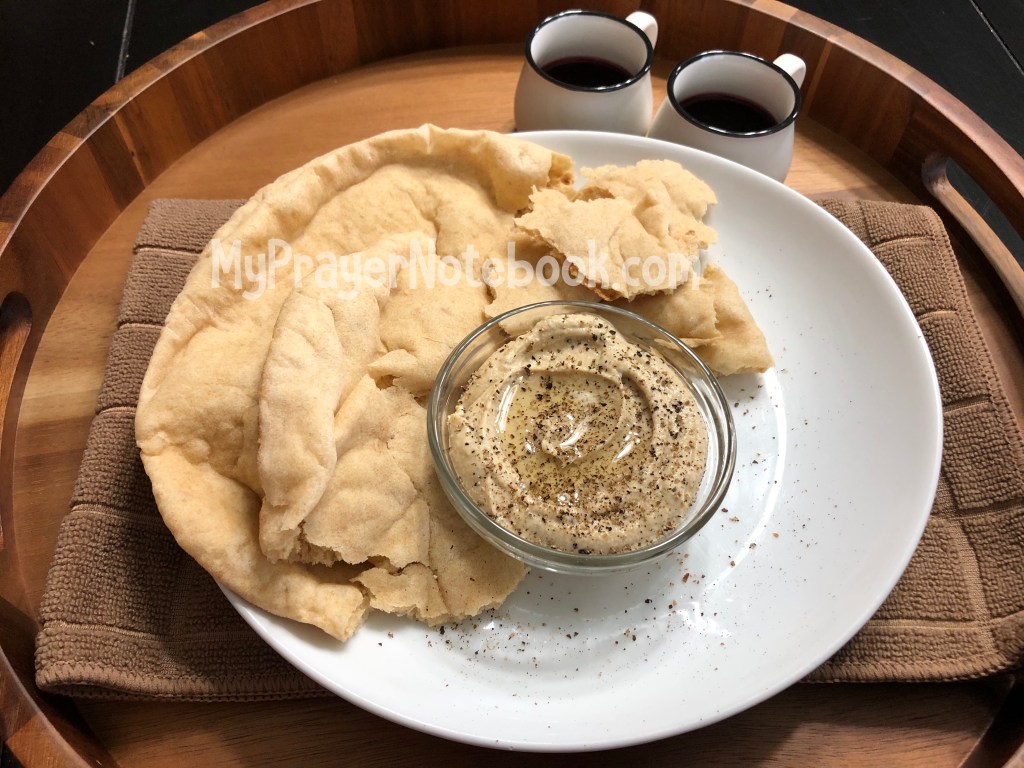
When your oven is ready, on a lightly floured surface, roll a dough ball out to about 1/4-inch thickness. Use a pizza peel or a dinner plate to quickly slide your pita dough onto your sheet pan or pizza stone. Quickly close the oven and bake about 2 minutes or until puffy and slightly golden. Mine took 2-1/2 minutes. Quickly remove the pita from the oven and place on a rack to cool, or if consuming right away, place on a serving platter covered with a tea towel to keep them warm.
Storing:
Pitas should last several days, but they never make it past 24-hours in my house.
Communion
The day I baked this bread, I had dedication to the Lord stirring in my heart. Paul talks about being crucified with Christ in Galatians 2:20, and we know he’s referring to human nature. Many years ago, I dedicated myself to the Lord. Through the years, I picked up behaviors and attitudes that I laid down. I have since laid them back down, but I was thinking about how it’s not a bad thing to rededicate myself to the Lord. These things don’t have to be sinful or bad, for example I laid down my gym habit. I went to the gym twice a day and had 3-4 hours a day invested in the gym. When I was doing that, it didn’t leave me extra time to read the Word or go to church.
As you take communion, consider your lifestyle and dedicating or rededicating yourself to the Lord. You may not be ready to dedicate yourself, and that’s ok. When you take communion ask the Lord to walk with you and bring you to a place where your desire is His presence. He loves you. He wants to bless you. He sees the best in you.

Leave a comment